Having a graphics card in PC is like a blessing for hardcore gamers for the smooth playing of games. Therefore, every player wants to know the ability of his graphics card to play the games.
For this purpose, gamers have to perform a graphics card test to know the potential for playing high demanding games. These tests will provide you with information about your graphics card and can test the card at its maximum limits.
This will tell you the boundaries of the graphics card and give you the idea that what your graphics card can handle at what resolution.
In this article, we will guide you for the whole process of testing and provide you with some tips to carry out correctly.
Table of Contents
Testing your Graphics Card – Steps:
Before setting the benchmarks and carry out testing, make sure that your PC operates in the environment and conditions that you usually provide it for working. For example, if you are fond of placing the CPU under the table, then it must be under the table during testing.
Because the change in environment may manipulate the testing results. This can be due to access to proper ventilation that is not accessible under the table.
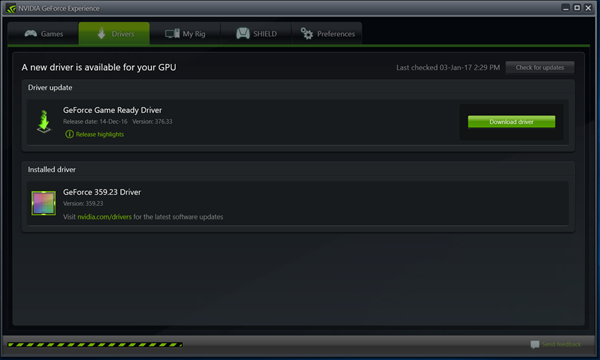
1.Drivers Updating
Drivers of graphics cards play an essential role in providing the best performance especially for playing high demanding games. Therefore, it is necessary to update the drivers before going into the test. However, the use of old version drivers can mislead the results.
Therefore, try to download and install the latest version of drivers from the manufacturer’s official website. Graphics card manufacturers release the updated versions within short periods to take with different bugs and enhance the performance.
In case the latest version of drivers creates any type of problem, then you can try the recent release. It is possible with the new version that it comes with any bug that disturbs the performance.
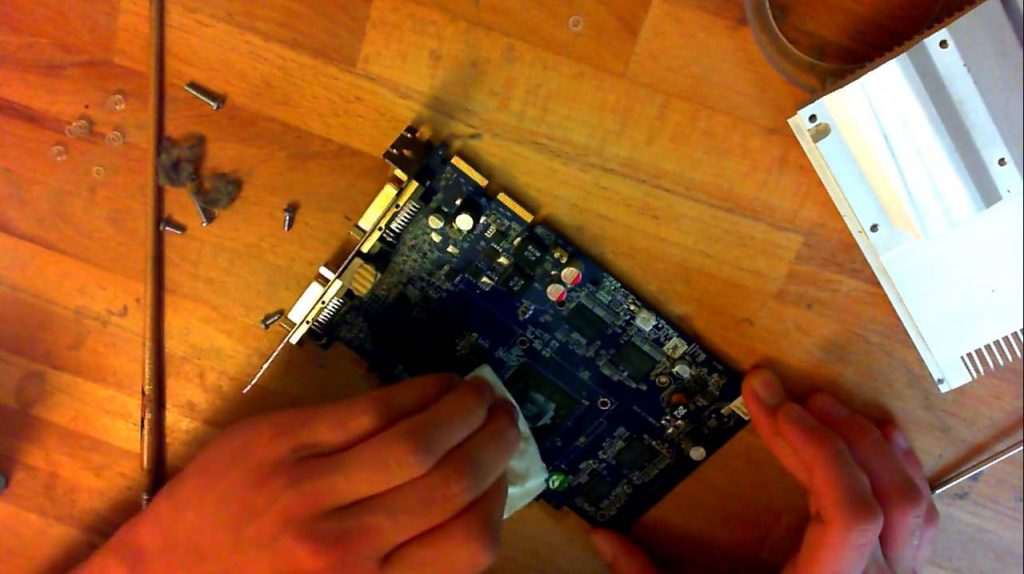
2.Clean Your Graphics Card
Keep the graphics card clean and free from dust maintains the performance and also increase the life span as well. Therefore, ensure the cleaning of the graphics card with the help of an electric blower. High air pressure helps to remove dust from heat sink that can create hurdles for smooth performance.
After cleaning with the air blower, use a small and soft brush to remove the stubborn dust from the PCB kit if the graphics card doesn’t have the back cover.
3.Benchmark software
Finally, benchmark software is required to carry out the test. There are various suites available over the internet that provides their services against cash. But also have some software that is free to use but with limited features.
If you don’t want to pay for testing software, then you can go for 3DMark benchmark software or for Heaven Benchmark. We recommend you to go for Heaven Benchmark because the free version of this software still has enough settings to test the graphics card properly.
Just get a free version from the internet and install it on your PC. After installation, run the program and a window appears and asks you to select different options like texture quality, resolution, etc. for testing at specific settings.
Always keep in mind, when you select the resolution in the benchmark software to test graphics card, always choose the same resolution as in the windows setting while playing games. For example, if you usually use 1920 x 1080 windows resolution for playing games, select the same for testing the graphics card.
If you want improved testing with stereo 3D, you must ensure to enable the 3D feature. This will let you know how your PC dealt with 3D. If the benchmark software runs very well without any crashes or bugs and a huge drop in frame rates, then be ready to play 3D games.
If you don’t know how to adjust the settings, there are some built-in combination of settings available to facilitate the users for testing. Just select the ‘Basic or Extreme’ options from the drop-down menu.
There are also options available to test a specific game performance on the graphics card. Many high profile games come with benchmark mention over the cover.
Usually, these are placed in the graphics settings of games. Even if the game is not mentioning the benchmark, you can use software like MSI afterburner or FRAPS to test the performance of the game.
4.Test Results
During running the Heaven benchmark software, you can see a lot of attractive 3D animations by rotating the camera over them. This is the simple way for testing the GPU graphics level, and you can get an idea of how conveniently it handles this level of graphics. It will also provide you the accurate information about any drop in frame rates, graphical bugs, or tearing.
If your graphics card is unable to run smoothly, it can be an indication that the graphics card is not capable of handling this level of graphics.
On the top right side, you can find an FPS counter that allows you to get a lot of information related to graphics card performance. For a better experience of playing games, just sit around the PC during benchmark testing and look at the counter for almost 30 minutes.
The higher the score over the FPS counter, the result could be better. The drop in the FPS rate will make your games slow and choppy during gameplay. If you find that the graphics card is struggling, you can change the settings in the benchmark software to get accurate results.
In this portion, you can also find different information about your graphics card like make, model, memory, operating temperature. But keep in mind to monitor the operating temperature because it is an indication of struggling with graphics cards for working. Overheating of graphics card can create different problems and system instability.
For starting the benchmark test, click on the benchmark button placed on the top left side of the software window. A shortcut can also be used by pressing the F9 button from the keyboard. Heaven benchmark software is capable of running different tests and providing results in a separate window.
The results provided by benchmark software are the average results based on high and low FPS rates. There is no quick way of comparing the results with other people. However, different websites are operating over the internet that has a discussion forum to let the users enjoy the results and outputs.
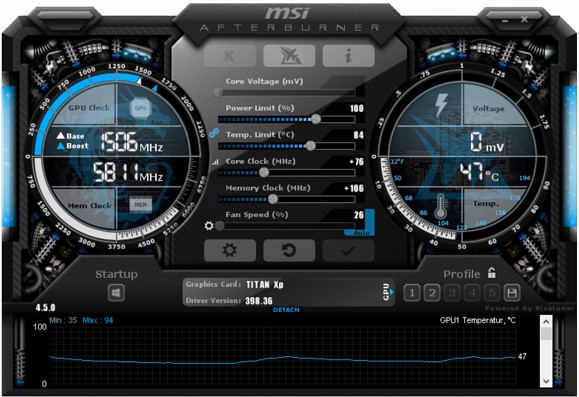
5.Overclocking and retesting
Overclocking is another feature to improve the performance, and most of the people don’t know accurately about it. Overclocking is tricky and requires some skills; therefore, you don’t have to mess with the settings excessively. Because excessive overclocking creates different problems, including overheating.
We recommend using MSI afterburner software for increasing memory clock and core clock either by +20Mhz or +50Mhz. After adjusting the clocks, try the stress test and if the graphics card works smoothly without any interruption and FPS remain stable. Increase some more clocks and repeat the test once again.
Don’t worry; your graphics card remain safe during all the process because they are specifically designed to shield themselves against physical damage. The only thing that can disturb the graphics card is by increasing the core voltage manually.
When your graphics card attains its maximum potential, simply set it as your benchmark and don’t try to increase voltage for getting high performance because it can hurt your graphics card and shorten the lifespan.
After the final adjustment of overclocking, start the benchmark testing, and compare the final results with the initial finding that you get before overclocking. At this point, you are very well aware of the potential of the graphics card.
It is easy for you to enjoy the gaming experience by keeping in mind the potential and requirements of the game, and you can play games without any interruption.
How to improve Graphics Card performance
If your graphics card doesn’t achieve the desired performance level that you are expecting or that is claimed by the manufacturer. Here are some important tricks that you can try before replacing your graphics card with a new one. This may help to save your hard-earned money.
As we discussed earlier, make sure that you have installed the latest version of drivers for your graphics card. You can check this by visiting the official website of the manufacturer and get the latest one if you have an old version.
Experimental and beta drivers are useful if the latest version of drivers is not working correctly. With the help of beta drivers, you can roll back the drivers to the last stable working drivers. After rolling back, you can restart your computer and wait for some minutes to properly start the programs at the startup.
Secondly, change the location of the PC if you place it under the table or in a low ventilated environment. The low ventilation system and dust can significantly slow down the performance of the PC as well as the graphics card. Ventilated placement also avoids overheating issues and prolong the life of the machine.
If the guide doesn’t help then you should consider updating your GPU with High End GPU of 2021.
Yes! You can test the power of your GPU by doing benchmarks on them and by overclocking them.
How can I check my temp of my GPU?
There are plenty of ways to check the temperature of GPU but the most common is to use a “dedicated program”. Most GPUs have a dedicated program that shows the temp in task manager
How do I check if my GPU is working?
Open the control panel then click on system and security and then on device manager. Open the display adapters section double click on the name of your GPU and it will show a message that this device is working and if it doesn’t show that then you should consider taking your PC to a computer expert.
I have been fond of computer technology for a long time, ever since childhood, and was always meddling with various hardware and software. With graduation in computer engineering from a recognized university like NUST was a dream come true and enabled me to pursue my dreams in swift ways. Currently, I am working for various websites as a hardware reviewer and content writer.
ProTechReviewer is reader-supported. When you buy through links on our site, we may earn an affiliate commission.
![How To Test Your Graphics Card [Step by Step Guide]](/img/how-to-test-your-graphics-card.jpg?nf_resize=fit&w=868)